Restorative yoga is a quiet, supported style of practice designed to make relaxation easier. Rather than moving quickly between poses or working toward intense stretches, you use blankets, bolsters, blocks, cushions, or a wall to support the body. Poses are held for several minutes while you allow the muscles to soften and observe the breath.
This approach can be useful when you feel tired, overstimulated, or physically tense. It also offers a gentle way to pause without requiring a demanding workout. The goal is not to force flexibility. A successful restorative pose should feel steady, comfortable, and well supported.
What to expect from restorative yoga
A restorative practice is usually slow and contains only a small number of poses. You may spend five to fifteen minutes in one position, adjusting props so that your head, spine, hips, and limbs can rest. Breathing remains natural and unforced. As the body settles, attention can move away from daily distractions and toward physical sensations, breathing, and stillness.
Regular relaxation practices may help some people manage everyday stress, release muscular tension, and prepare for sleep. Restorative yoga can also encourage greater awareness of how the body feels. It is not a substitute for medical care, physical therapy, or treatment for a diagnosed condition.
Five restorative yoga poses to try
1. Supported Child’s Pose
Kneel with your big toes together and knees comfortably apart. Place a bolster or several folded blankets lengthwise between your thighs. Fold forward and rest your torso and head on the support, turning your head to one side. Keep your arms wherever they feel comfortable.
This position can provide a contained, restful shape for the back and shoulders. Turn your head halfway through the pose if that feels comfortable, or add more height beneath the support so your neck does not strain.
2. Legs Up the Wall
Sit sideways with one hip close to a wall, then lower onto your back as you extend your legs upward. Your hips may be close to the wall or several inches away; choose the position that feels most comfortable. Rest your arms by your sides and let your legs relax.
Stay for several minutes while keeping the jaw, shoulders, and abdomen soft. Come out by bending your knees, rolling onto your side, and pausing before sitting up. If the pose creates pressure in your lower back or causes discomfort, move farther from the wall or place a folded blanket beneath your head.
3. Supported Bridge Pose
Lie on your back with your knees bent and feet resting on the floor. Lift your hips just enough to slide a yoga block or firm cushion beneath the broad, bony area of your pelvis. Lower your weight onto the support and allow your arms to rest beside you.
The support should feel stable, and there should be no pinching in the back or neck. Keep the pose low and passive rather than trying to lift higher. To release, press into your feet, lift your hips slightly, remove the prop, and lower down slowly.
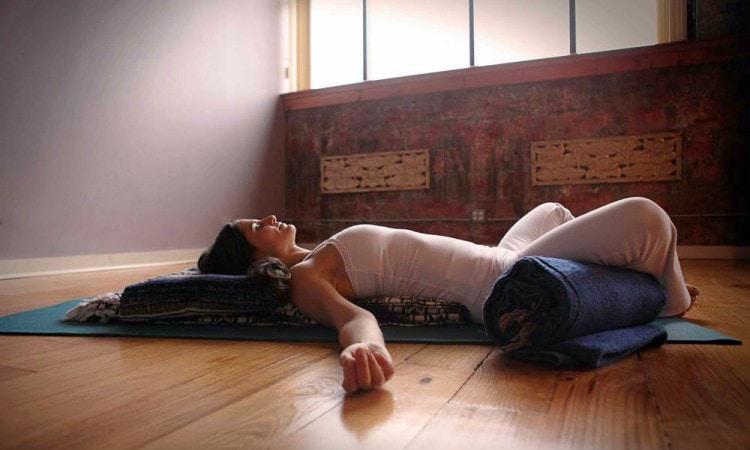
4. Reclined Bound Angle Pose
Lie on your back and bring the soles of your feet together, allowing your knees to open outward. Place folded blankets or cushions beneath both thighs so the legs are fully supported. You can also rest your head and upper back on a blanket if lying flat is uncomfortable.
Let your hands rest on your abdomen or by your sides. The knees do not need to reach the floor. If there is pulling in the hips or inner thighs, add more support or choose a different pose.
5. Supported Forward Fold
Sit with your legs extended, or bend your knees slightly. Place a bolster, pillows, or folded blankets across your thighs and fold forward from the hips, resting your torso and head on the support. Keep the spine comfortable rather than trying to reach the feet.
This variation is more restorative when the support carries most of your upper-body weight. Avoid rounding deeply or pulling yourself farther into the stretch.
How to create a simple practice
Choose a quiet, comfortably warm space and gather enough support to avoid straining. A blanket can serve as padding, a cushion can replace a bolster, and a wall can provide support for the legs. Try this sequence:
- Begin with two or three minutes of quiet breathing while lying down.
- Practise Supported Child’s Pose for three to five minutes.
- Move to Reclined Bound Angle Pose for five minutes.
- Rest in Legs Up the Wall for five to ten minutes, if comfortable.
- Finish lying flat or on your side for several quiet breaths.
Move slowly between poses and give yourself time to notice the effects of each one. Restorative yoga does not require a particular breathing ratio. Simply let the breath remain smooth, and avoid holding it or deliberately making it deep if that creates tension.
Comfort and safety reminders
- Support joints and limbs rather than leaving them suspended.
- Back out of a pose if you feel sharp pain, numbness, tingling, dizziness, or pressure that does not ease.
- Use less range of motion and more height when a pose feels intense.
- Ask a qualified instructor or healthcare professional about modifications if you are pregnant, recovering from an injury, or managing a health condition.
The most useful restorative pose is the one in which you can remain present without fighting your body. With patient support and unhurried transitions, even a short practice can become a practical way to make space for rest.